The first shot taken with Microsoft Kinect. Thanks a lot to Fukui-sensei for providing such a nice tool.
Tuesday, December 21, 2010
Sunday, December 5, 2010
2
And that's it. This is the result of the simulation of a modified Corobot with stereo camera:
MRDS: SIMULATED STEREO CAMERA
During the last few weeks I have been working with Microsoft Robotics Developer Studio, it incorporates a very powerful simulation environment that enables you to visualize your robot and even program it even before actually building it.
By default a lot of simulated entities, basic for robotics, are provided: Simulated IR Distance Sensor, Simulated Sonar, Simulated Webcam, Simulated GPS Sensor, Simulated Laser Range Finder, etc...
But I was missing another basic entity often used by robots: A Stereo Camera. After reading some posts at MRDS forum I could not find a suitable solution (easy and fast to implement), so I just built my own solution.
If you want to simulate a stereo camera on Microsoft Robotics Developer Studio, you can follow this 3 steps:
Step 1- Add this class to your project:
public class StereoCameraEntity { public CameraEntity leftCam; public CameraEntity rightCam; public StereoCameraEntity() { } public StereoCameraEntity( String parentEntityName,// The name of the parent entity (used to generate a unique name) int viewSizeX, //Image width int viewSizeY, //Image height float viewAngle,//View angle of the camera in degrees Vector3 position,//Position of the center of the stereo camera float baseLine,//Distance between the center of the cameras in centimeters bool isRealTime)//Renders every frame { //Initialize left camera leftCam = new CameraEntity( viewSizeX, viewSizeY, (float)(viewAngle * Math.PI / 180.0)); leftCam.State.Name = parentEntityName + "_LeftCam"; leftCam.IsRealTimeCamera = isRealTime; leftCam.State.Pose.Position = new Vector3( position.X - (baseLine / 100.0f) / 2.0f , position.Y, position.Z); //Initialize right camera rightCam = new CameraEntity( viewSizeX, viewSizeY, (float)(viewAngle * Math.PI / 180.0)); rightCam.State.Name = parentEntityName + "_RightCam"; rightCam.IsRealTimeCamera = isRealTime; rightCam.State.Pose.Position = new Vector3( position.X + (baseLine / 100.0f) / 2.0f , position.Y, position.Z); } }
This class is just a wrapper for CameraEntity. When calling the constructor for the new class that you just created you need to provide:
- parentEntityName: A string containing the name of the parent entity (It will be used to create a unique name for the cameras)
- viewSizeX: An integer for the horizontal resolution of the cameras (In pixels).
- viewSizeY: An integer for the vertical resolution of the cameras (In pixels).
- viewAngle: A float for the view angle of the cameras (in degrees).
- position: A Vector3 containing the position of the stereo camera (in meters).
- baseLine: The separation between the cameras (in centimeters).
- isRealTime: True to render every frame.
Step 2- Inside the constructor of your entity create a new StereoCameraEntity and insert it as a child:
StereoCameraEntity stereoCam = new StereoCameraEntity( name, 320, 240, 30.0f, new Vector3( xLocation, yLocation, zLocation), 10.0f, true); InsertEntityGlobal(stereoCam.leftCam); InsertEntityGlobal(stereoCam.rightCam);
This creates a new stereo camera with a resolution of 320x240 pixels, a field of view of 30 degrees, a base line of 10 centimeters, located at the point (xLocation, yLocation, zLocation) and rendering every frame.
Step 3- Modify the manifest of your project to include this:
<servicerecordtype>
<dssp:contract>http://schemas.microsoft.com/2006/09/simulatedwebcam.html</dssp:contract>
<dssp:service>http://localhost/MyRobot/LeftCam</dssp:service>
<dssp:partnerlist>
<dssp:partner>
<dssp:service>http://localhost/MyRobot_LeftCam</dssp:service>
<dssp:name>simcommon:Entity</dssp:name>
</dssp:partner>
</dssp:partnerlist>
</servicerecordtype>
<servicerecordtype>
<dssp:contract>http://schemas.microsoft.com/2006/09/simulatedwebcam.html</dssp:contract>
<dssp:service>http://localhost/MyRobot/RightCam</dssp:service>
<dssp:partnerlist>
<dssp:partner>
<dssp:service>http://localhost/MyRobot_RightCam</dssp:service>
<dssp:name>simcommon:Entity</dssp:name>
</dssp:partner>
</dssp:partnerlist>
</servicerecordtype>
And that's it. This is the result of the simulation of a modified Corobot with stereo camera:
Sunday, November 28, 2010
2
MICROSOFT KINECT FOR ROBOTIC APPLICATIONS
In the last few days Kinect, a product developed by Microsoft and oriented to the gaming industry, has been making quite an impression in the robotic world.
This device was announced by Microsoft as the gadget that would change the history of the gaming industry. Well, I don't know if that would be true. Only time will tell. But, on the way, they created a tool with practically endless possibilities for robotic applications. I wonder if Microsoft saw it coming...
But, what makes it so appealing for robotics?
The device offers a RGB camera and an IR camera with a frame size of 640x480 pixels and a frame rate of 30FPS. But the really interesting feature is its Depth camera. This depth camera enables to build a 3D view of the environment surrounding the Kinect, which allows many applications in robotics.
Here is an example:
Another very interesting fact is its price: around $199. The price of other similar sensors is at least 10 times more expensive, for example the price of a Point Grey Bumblebee2 stereo camera is around $1900. Not everyone can afford to spend almost $2000 in a sensor, but almost every hobbyist can buy a Kinect (and when you get tired of playing with your robot you can use it to play with XBOX too :P)
Of course, a lot of people quickly realized the immense potential of this device and several initiatives appeared to build an Open Source driver that enabled people to use Kinect on a PC. Being OpenKinect one of the most active projects at the moment.
Recently, the people at ROS (Robot Operating System) integrated OpenKinect on his system and as a result now anyone using ROS can easily take advantage of Kinect:
As long as Kinect is a device engineered to be used on indoor environments its behavior on outdoor environments can be predictably poor. And as you can see on the experiment carried out by the researchers at Meiji University's AMSL Racing group the results outdoors in a sunny environment is quite poor, but the result in a shady environment is not too bad, though.
If I were Microsoft I would integrate Kinect into Microsoft Robotic Developer Studio right away.
Tuesday, November 16, 2010
0
HRP2 PROMET: MADE IN JAPAN
Today I visited AIST JRL (Advance Institute of Science and Technology - Joint Japanese-French Robot Laboratory) where my fellow Pablo F. Alcantarilla and his supervisor, Dr. Olivier Stasse, kindly introduced me to this guy:
Its name is HRP2 Promet, a 1.6 meters tall, state of the art, humanoid robot. It was built by Kawada Industries, Inc and is used at AIST as a research platform. I had seen this robot on the internet before but nothing compared to seeing it in action in real life.
During the visit the robot performed several demos, including walking in a constrained environment (see next picture) and moving to a goal position by using Computer Vision.
On that same laboratory they are developing HRP4-C, the little sister of HRP2. As she is the youngest in the family she wants to be an artist, but unfortunately I have no pictures of HRP4-C, they still keep it under a lot of secrecy. But you can see this video taken at "Digital Contents Expo 2010":
Any way, meeting HRP2 was fascinating.
Saturday, November 6, 2010
0
Next Friday November 19th is the final. Good luck to all the teams!!
TSUKUBA REAL WORLD ROBOT CHALLENGE: TRIAL SESSION
Japan is a country well known for being the leader on robotics field, but... how does a country get to be at the top of developing new robots and applications?
The answer is rather simple: challenging talented people all around the country.
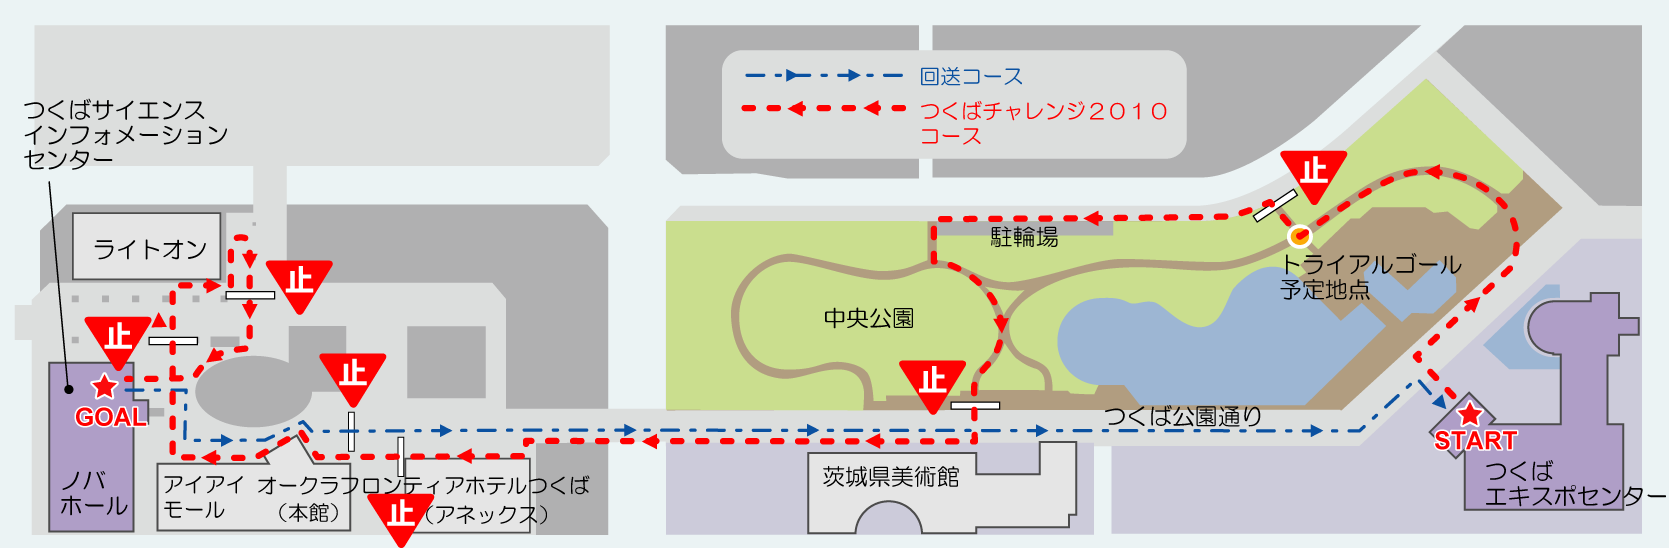
This is the aim of Tsukuba Real World Robot Challenge (Tsukuba Challenge in short), it is a competition organized by the New Technology Foundation at Tsukuba city. During this competition teams of University Students from all around Japan and their robots gather together in order to test the skills of the robots in autonomous navigation on a real environment.
The target of the robots is to autonomously complete a circuit around a real environment and real obstacles, like humans walking or riding bikes. Usually the challenge takes place at Tsukuba's Central Park. For us, humans, the task is very simple but for a robot it supposes an Herculean effort.
Today a trial session was held and here you can see some pictures of the robots that participated:
Please do not be fooled by the simple appearance of these robots, for the real deal is inside of them. As long as the robot has wheels so it can move, the important thing is the control algorithms. They mix GPS receivers, Laser Range Finders and cameras in order to solve the challenge.
Next you can see a short video showing a couple of robots at the start line, as you can see some of the robots perform better than others :)
Next Friday November 19th is the final. Good luck to all the teams!!
Sunday, October 24, 2010
0
NEW LIFE, NEW CHALLENGES
In Tsukuba University's CVLAB are researching about the application of Mutual Subspace Methods and its derivates to solving several Computer Vision problems. For many of the methods, information coming from multiple points of view (multiple cameras or a camera in different positions) of an object is used.
For example, in this work: "Face recognition using multi-viewpoint patterns for robot vision" a face recognition system using multi-viewpoint images is developed. A still camera is used in this work, so in order to acquire multi-viewpoint images of the user's face the user should move around the camera and change the pose of his face.
The challenge for me is to develop a robot capable of moving a camera in order to get multi-viewpoint images of a target, it doesn't matter if it is a face, an apple or whatever. But, in the case of face recognition, the user doesn't need to move his face around the camera, the robot moves the camera around the user's face. So the user can go on with his life undisturbed :p)
To undertake this challenge first I must build a simulation of the robot and later when the simulations give good results build the actual robot. So I am going to start building the simulation using Microsoft Robotics Developer Studio
This is so exciting! I will keep posting as the project goes on.
Monday, October 11, 2010
0
A space rocket! How cool is that? xD
SETTLED IN TSUKUBA
Well, it has been almost one week since my wife and I arrived to Japan. We are almost settled so I would like to talk a little bit about the city we are living in: Tsukuba
| Tsukuba's flag |
The city is known for the location of Tsukuba Science City. A planned city developed around 1960. Inside the "research world" it is usually referred as "the researcher's paradise" and so far it is a more than deserved name. This city has everything a researcher could ever need: research institutions, nice environment and a lot of peaceful places to find inspiration.
This city has a population of about 200.000 inhabitants and I've heard that about 5% of them have a PhD.
When I have time I will upload more pictures but for now you can see this, it is on my way to the laboratory:
Subscribe to:
Posts (Atom)